This tutorial was written by our dear friend Sheila on 28th August, 2007 and translated by Trixie, with her permission.
We would like to thank Sheila and the ArteOficius Group for allowing this tutorial to be translated and placed on this site.
This tutorial does not use any outside filters.
Download supplies here
Place the gold and silver patterns in your Patterns folder, the Preset in your Presets Folder and open the two masks in PSP and minimize.
You will need a Misted Tube for best results.
O.k let's get started!
1. Open up the Misted Tube you will be framing. Go to Window / Duplicate and close the original.
2. Resize tube to 400px high. (Bicubic)
3. From your tube, choose a dark colour for your Background and a light colour for your Foreground.
4. Layers / New Raster Layer and Flood Fill with your dark colour.
5. Layers / New Raster Layer and Flood Fill with your light colour.
6. Layers / New Mask Layer / From Image and select Nik-Abstract914 - Invert checked.
7. Layers / Delete and answer "Yes" to the pop up window.
8. Layers / Merge / Merge Group.
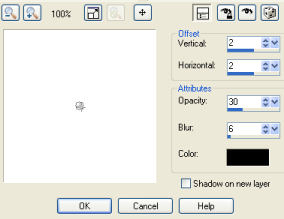
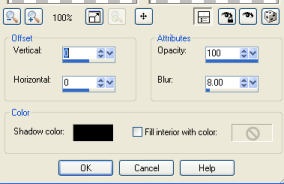
9. Effects / 3D Effects / Drop Shadow with these settings:
10. Adjust / Sharpness / Sharpen more.
11. Close your tube layer by clicking on the eye in the Layers Pallet and make sure one of the other Layers is highlighted and Merge Visable.
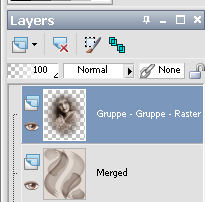
12. Reopen your Tube Layer and go to Layers / Arrange / Bring to top. This is what your Layer Pallet should look like:
13. Duplicate your Tube Layer and go to Effects / User Defined Filter and choose Emboss 5 from your Presets Menu.
14. Layers / Arrange / Move Down and reduce the Opacity of the Layer on top to between 40 & 60 whichever looks best.
15. Layers / New Raster Layer. Selections / Select All. Effects / 3D Effects / Cutout using these settings:
16. Select / Select none.
17. Image / Add Borders. Symmetric checked:
1px Black
2px White and Flood Fill with the Silver/Gold pattern
1 px Black
18. Image / Add Borders 40px and Flood Fill with your light colour. Select this border with your magic wand.
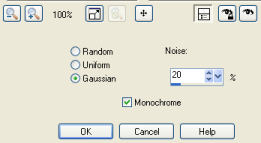
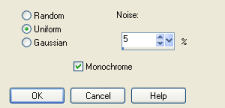
19. Adjust / Add-Remove Noise / Add Noise using these settings and keep Selected.
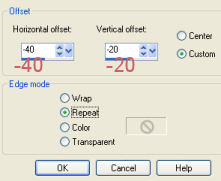
20. Effects / Image Effects / Offset and use these settings:
21. Selections / Invert
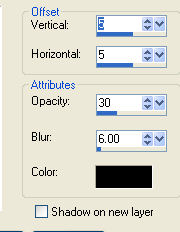
22. Effects / 3D Effects / Drop Shadow using these settings:
23. Selections / Select none.
24. Repeat Borders as in Step 17.
25. Image / Add Borders 40px and Flood Fill with your dark colour. Select this border with your magic wand.
26. Adjust / Add-Remove Noise / Add Noise using these settings:
27. Repeat Step 20 but change the Horizontal to 40 and the Vertical to 20.
28. Selections / Invert. Effects / 3D Effects / Drop Shadow as before.
29. Selections / Select none.
30. Repeat Borders as in Step 17.
31. Image / Add Borders 15px using your light colour and Select with Magic Wand.
32. Selections / Invert and give it the same Drop Shadow as before.
33. Selections / Invert. Effects / 3D Effects / Inner Bevel using these settings:
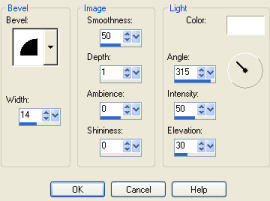
34. Selections / Select none.
35. Image / Add Borders 15px using your dark colour and Select with Magic Wand.
36. Repeat Steps 32, 33 and 34.
37. Layers / New Mask Layer / From Image and Select MD_Soft_Overlay - Invert checked.
38. Layers / Delete and answer "Yes" to the pop up window. (this won't look right until you do the next step)
39. Layers / Merge / Merge all Flatten.
40. Repeat Borders as in Step 17.
41. Image / Add Borders 10px in your dark colour and Select with Magic Wand.
42. Selections / Invert and give it a Drop Shadow as before.
43. Selections / Invert. Effects / 3D Effects / Inner Bevel with these settings:
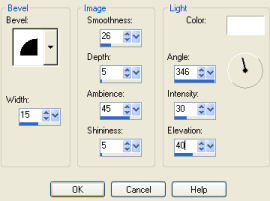
44. Selections / Select none.
45. Resize if necessary and decorate with any embellishments if you wish.
46. Add your Watermark and save as a jpg.
I hope you enjoyed this tutorial.
Bjks Sheila.
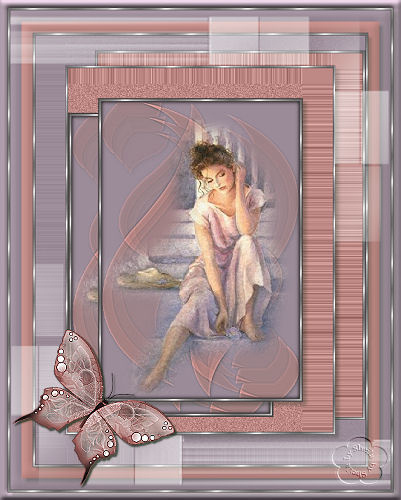
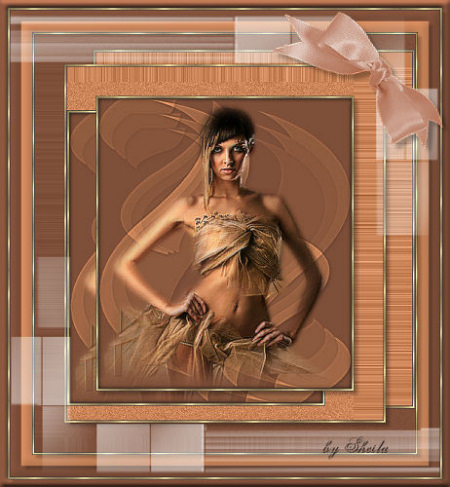
Another example by Sheila:
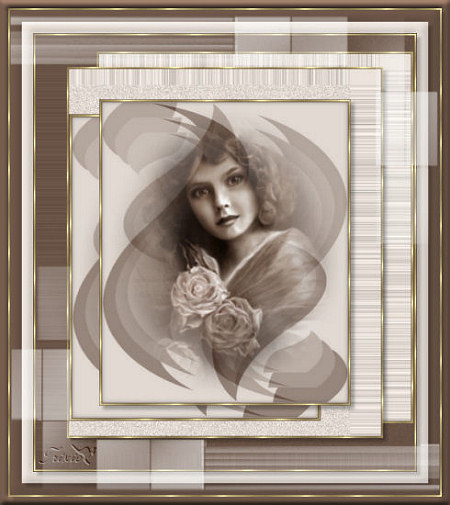
An example by Trixie:
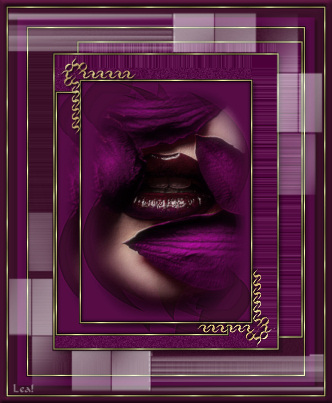
An example by Lea: