This tutorial was written by Leanne, Castle Creations, on the 11th March, 2009.
Supplies needed:
Image of your choice and
any embelishments you may like to use
Kiwi's Oelfilter - Zig-Zack
Simple Filters - Half Wrap
Plugins can be downloaded here
This tutorial was written using PSPX.
1. Open your image, duplicate and close the original.
Resize if needed.
2. In your materials pallete, choose a medium colour for the Foreground and a lighter or complimentary colour for the Background.
3. Select / Select All.
Effects / 3D Effects / Cutout:
V & H 3
Opacity 50
Blur 10
Shadow Colour Black
Fill Interior Unchecked
Repeat Cutout with H & V at (minus) -3
Select None.
4. Add the following symmetric borders to your image:
10px in the Foreground colour
5px in the Background colour
Repeat twice (until you have 3 of each colour borders).
5. Select / Select All / Select / Modify / Contract by 45. Select / Invert.
6. Effects / Plugins / Kiwi's Oelfilter / Zig-Zack:
Kiwi most likely found last in the list due to it's name -

Keep Selected.
7. Adjust / Sharpness / Sharpen.
8. Effects / 3D Effects / Inner Bevel:
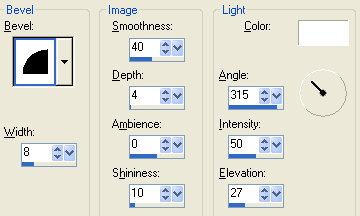
Select None.
9. Add a 45px border in the Foreground colour and select the border with the magic wand.
10. Effects / Plugins / Simple / Half Wrap.
Keep Selected.
11. Selection / Promote Selection to Layer.
Select None.
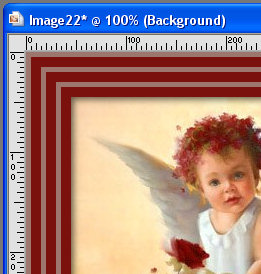
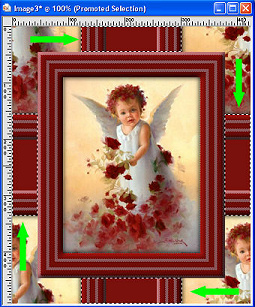
Make sure the top layer is now active and using the Selection Tool set to Rectangle, select the areas as in the example below:
Hit the delete key one time.
Select None.
12. Still working on the top layer:
Selections / Select All / Selections / Float / Selections / Defloat.
Adjust / Blur / Gaussian Blur / 6.
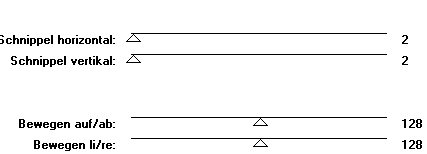
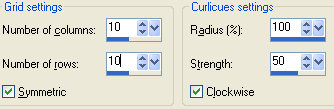
Effects / Distortion Effects / Curlicues:
Keep Selected
13. Layer / New Raster Layer.
Floodfill with Foreground colour and lower the opacity to 70%.
Effects / 3D Effects / Inner Bevel - using the same settings as in step 8.
Select None. Layers / Merge Visable.
14. Add a 2px border in any colour not being used in your frame.
Select with magic wand and floodfill with Foreground colour.
Effects / 3D Effects / Inner Bevel with the same settings as in previous steps.
Select None.
15. Repeat steps 4, 5, 6, 7 and 8.
16. Add a 2px border in the Foreground colour.
17. Resize as needed. Add watermark and any embelishments you like.
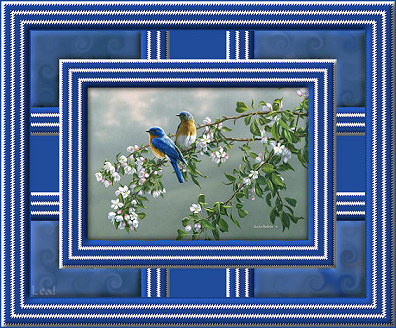
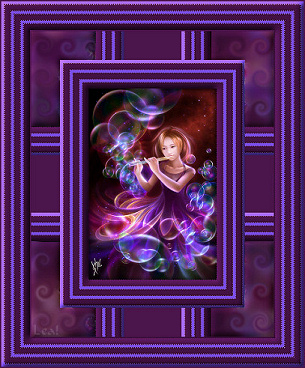
More exampbles by Lea: